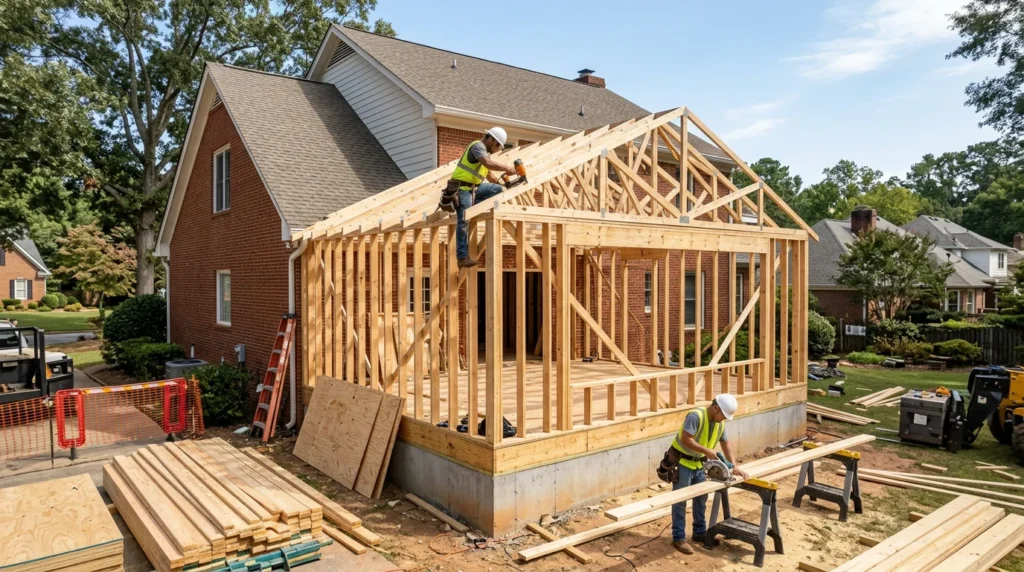
Quick answer: Plan a room addition by confirming what you need (space, layout, access), checking zoning and permit requirements early, and budgeting for structural, HVAC, electrical, and finish work—not just framing. Get a clear scope with drawings, verify how the new space ties into your roofline and foundation, and schedule decisions on windows, insulation, and flooring before construction starts to avoid delays and change orders.
Start With Scope, Site Limits, and a Realistic Layout
A smooth addition starts with a simple question: what problem is the new space solving? A bedroom suite needs quiet, storage, and a bathroom plan; a family room needs traffic flow and natural light; a home office needs sound control and outlets. Sketch how you’ll enter the new room, where furniture will go, and how it connects to existing hallways so you don’t create awkward dead ends.
Next, look at the site and the house itself. Setbacks, easements, septic fields (if applicable), and drainage can limit where you can build. Inside, locate major obstacles like load-bearing walls, chimneys, and the main electrical panel. If you’re comparing options for room additions Athens GA, ask early how the addition will match the existing roof pitch, siding, and window proportions so it doesn’t look tacked on.
Decide what “finished” means before anyone swings a hammer. “Drywall ready” versus fully finished changes timelines and coordination. Pick at least the big-ticket items—window sizes, exterior doors, ceiling height, and whether you want built-ins—so the framing plan doesn’t keep changing.
Athens-Clarke County Checks to Do Before Design Is “Final”
Verify zoning, setbacks, and permit requirements directly with Athens-Clarke County resources. Start with the ACC Planning Department for zoning and setback questions, and the ACC Building Permits/Inspections resources for the building permit process and required inspections. If you’re unsure which office applies, call ACC and ask which department confirms your parcel’s zoning, setbacks, and overlay rules.
Local flags to ask about up front: whether the property is in a historic district or overlay with design review requirements; any stream buffers, floodplain limits, or easements that affect buildable area; and stormwater/drainage expectations for new roof area and impervious surface. Also ask how driveway access, tree protection rules, or utility easements might affect where the addition can sit.
Bring a simple site sketch when you ask questions: property lines (approximate is fine for a first conversation), the existing house footprint, and the proposed addition area. You’ll get clearer answers and avoid redesigning after you’ve already paid for drawings.
Water Management and Roof Tie-In Details to Confirm in Writing
Most “mystery leaks” after an addition come from the transition between old and new. Ask for a plan that covers roof-to-wall and roof-to-roof connections, plus how water is directed away from the foundation. These are items to confirm in writing before work starts.
Items to confirm in writing: step flashing where a roof meets a wall; kick-out flashing at the bottom of roof-to-wall intersections so water doesn’t dump behind siding; underlayment choices (including ice-and-water membrane where applicable to the roof design and local conditions); how valleys will be flashed; how siding and housewrap will lap over flashing; and how gutters/downspouts will route water away from the house (including where downspouts discharge so they don’t saturate a crawlspace or wash out a new corner).
Also confirm how the new foundation ties into drainage: grading away from the addition, any splash blocks or extensions, and whether existing downspouts need to be relocated so the new roof area doesn’t overload one corner.
Bid Template and a Milestone Plan That Prevents Delays
Use the same “apples-to-apples” checklist for every quote so you can compare scope, not just the total. Require these line items in every bid:
- Permit responsibility (who applies, who schedules inspections)
- Engineering needs (if any) and who hires/pays the engineer
- Foundation type and scope (slab/crawlspace/basement tie-in, piers/footings, excavation, waterproofing)
- Framing scope (including any beam/column work)
- Roof tie-in and flashing scope (spelled out, not “as needed”)
- HVAC scope (extend existing vs. new system, returns, ventilation for baths)
- Electrical scope (panel capacity check, new circuits, smoke/CO requirements if applicable)
- Plumbing scope (if adding a bath/laundry, venting approach)
- Insulation specs (type and stated R-values for walls/ceiling/floor where used)
- Window/door specs (brand/series or performance level, sizes, tempered glass where required)
- Drywall finish level (e.g., Level 4 vs. Level 5 where desired)
- Trim scope (base/casing/crown, interior doors, hardware allowances if used)
- Flooring scope (subfloor, transitions, matching existing)
- Paint scope (walls/ceilings/trim, primer assumptions)
- Cleanup and debris hauling
- Warranty terms (what’s covered and for how long, in plain language)
A dated milestone plan keeps decisions from landing at the worst possible time. Sequence: Design → Engineering → Permit → Order long-leads → Demo → Dry-in → Rough-ins → Insulation → Drywall → Trim/Punch. Before Design: lock the room’s purpose, rough dimensions, and how it connects to the house. Before Engineering: finalize any wall removals, beam locations, and roofline choice. Before Permit: confirm site placement, setbacks, and any overlay requirements. Before Order long-leads: choose windows/doors, exterior siding/roofing match, and major fixtures (especially tubs/showers). Before Demo: plan temporary access and dust control. Before Dry-in: confirm roof tie-in details and flashing items in writing. Before Rough-ins: finalize lighting layout, outlet locations, bath fan routing, and HVAC supply/return locations. Before Insulation: confirm insulation type/R-values and air-sealing approach. Before Drywall: confirm drywall level and ceiling details. Before Trim/Punch: select trim profiles, interior doors, hardware, and paint colors so finish work doesn’t stall.
For help scoping, coordinating, and building an addition that blends with your home, Tipton’s Fine-Tuned Carpentry can walk you through the process.